Diamond Shape Geometry
A diamond is a two-dimensional flat quadrilateral with four closed straight sides. Just kidding, don’t worry, we’re not going back to high school math class. But, geometry is a fundamental part of creating a brilliant, sparkling diamond! Diamonds have special optical properties that are only unlocked with the help of an experienced cutter to show all those special stones have to offer.
What is geometry?
Easily explained, geometry is a branch of mathematics that deals with the measurement, properties, and relationships of points, lines, angles, surfaces, and solids. Diamond cutters (the ones who do the hard work to create the fabulous rock that will eventually lead to adorn your finger) must have a great grasp on geometry, to know exactly where those facets have to be placed to create the perfect reflections internally. Without this knowledge, you’ll have a diamond that looks white (not in a pretty way) and flat. Not the tons of scintillation you’re used to.
A badly cut diamond is significantly less expensive, because it will be harder to sell. Those are ones you have to watch out for as well- because if a diamond is too inexpensive compared to it’s friends in the same categories on the same site, this might be one of the reasons.
What parts of the diamond is influenced by geometry?
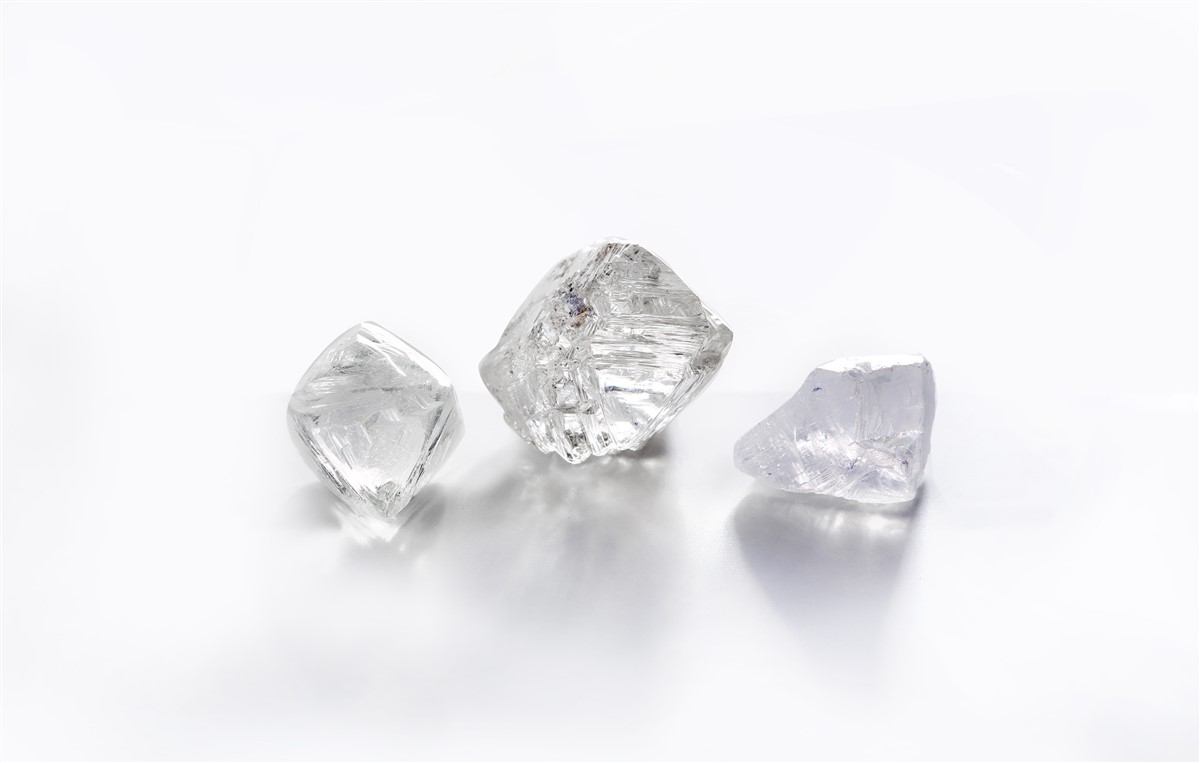
There are so many factors that create a stunning diamond. Things like table width (the flat part on the top), total depth, length, and width all affect how the light will be reflected internally. This is the bulk starting point that has to be properly set before anything else can be added to help the cut of the diamond.
The next important key is the facet placement. These are the flat edges that line the diamond above and underneath the girdle (middle part) of the diamond. These have to be symmetrical, evenly placed, and in uniform size. They have to match above and below. Wonky facets lead to unattractive cut patterns. This is very obvious in shapes like princess, or emerald, where the facet junctions need to meet up and create appealing design. Even in a decently cut diamond, if you have facet junctions that don’t line up, it will be super noticeable and if you’re going to spend the money, you don’t want to look down at a diamond that is off just the slightest bit (you don’t have to be OCD for it to bug you!).
Overall, balance is key here. Happy and balanced diamond = happy life!
Cutting process
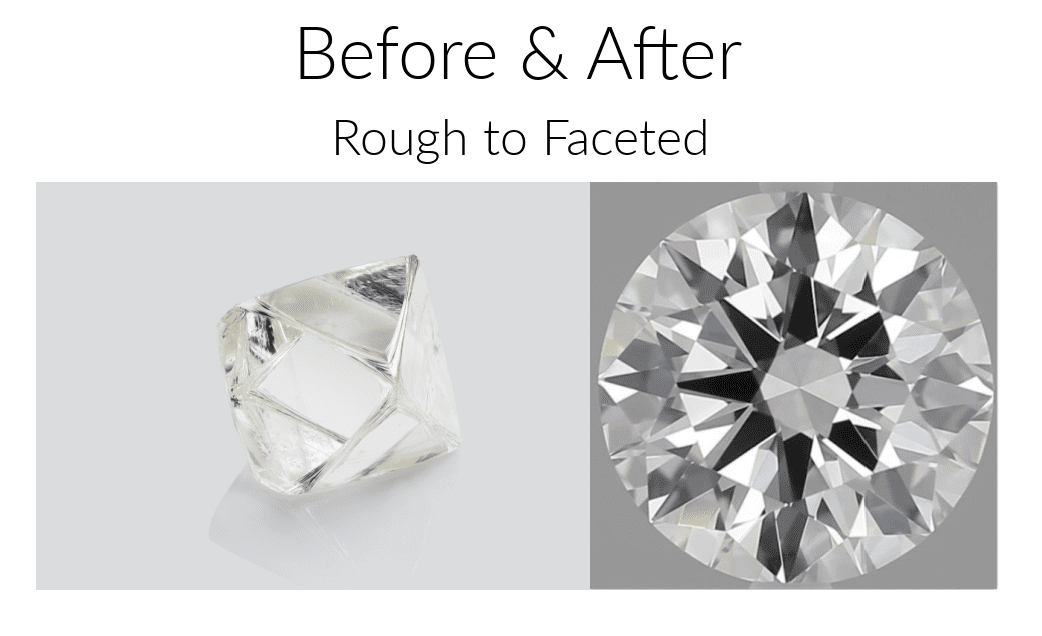
So we’ll go over the main geometric elements that join together to create a stunning diamond, but how does it get to this point? And why is it important in the beginning to create a well planned diamond? Well, think of this point as the blank canvas- an octahedral stone, fit to become just about anything. You’ll want to plan out how many smaller diamonds you can get out of the one piece of rough. Typically, depending on size, the cutters can get 2-4 diamonds out of one piece of rough.
It starts with the planner- this person will use a computer-aided design (CAD) program to help map out where all the diamonds will be cut from, to use the most, and loose the least weight. Traditionally this was done by hand. But at our day and age now, it’s much easier, quicker, and sometimes more reliable to use a computer to help.
Once the cleaving process is done (cutting the stone into pieces that will be used as individual diamonds) the next is bruiting. This creates the shape of the diamond, by spinning the edge of another diamond against it. Since diamonds are so hard, they can only be scratched (or in this case bruited) by another diamond.
Polishing is the final step, and this is where those angles and proportions we’ll be getting into next really start to come to life. This is the part that creates the main facets, and then the more “accenting” facets into the diamond itself. The polisher has to make sure that everything lines up, and is symmetrical, otherwise the rest fo the polishing process is going to be difficult and not result in a brilliant sparkling diamond.
Geometrical shapes in the diamond world
There are some very standard diamond shapes that may have you getting flash backs to geometry class… only blingy-er and way more fun! With each shape there are desired expectations for the perfect parameters to create a bright, well-cut diamond. The GIA and other grading labs use these measurements to grade the cut of the diamond. If a few things are off, it will get a lower grade to reflect that. So keeping within the highest grading standards available will promise the best cut, and keeping good color and clarity in mind, will offer sparkle and brilliance.
Circle
Round Brilliant
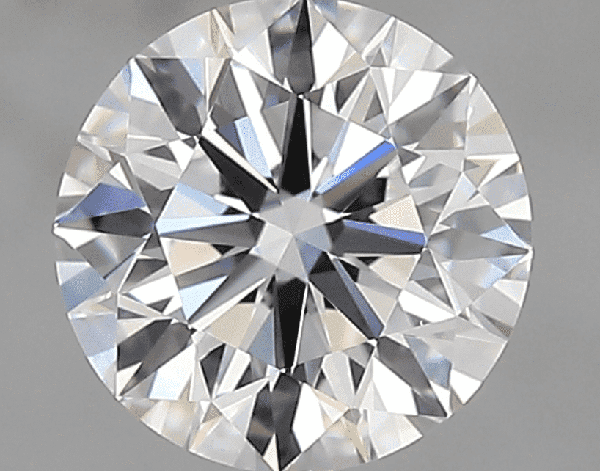
The circle family will include round brilliants. Other shapes may be slightly more expensive than some of their four-sided friends, due to the fact that a natural rough diamond is the octahedral shape (like two pyramids stacked end to end) and waste a little more of the diamond. However, the cutter’s ability to use geometry (see the trend yet?) To make the most out of the rough and create usually two or more round diamonds is key.
The faceting process here is relatively simple (for someone who does it all day), you have either 57 or 58 facets included in a round brilliant. The first and largest is the table. Then above the girdle (middle) there are 8 star facets (in the shape of a wide, stubby triangle) surrounding the table, and 8 bezel facets (in the shape of wide kites. Completing the crown of the diamond are the upper girdle facets, which are shaped like a triangle with one edge slightly curved. All of these will (in a well-cut diamond) meet at the edges nicely and uniformly.
Underneath the girdle is two sets of facets- the 16 lower girdle facets will be long triangles, and and the 8 pavilion mains will be in the shape of sharp-edged tear-drops. The culet is the last of the facets if there is one. This will be where the pointy end of the diamond was cut off, to help prevent chipping and allow the diamond to be a little safer, less risk involved of breaking.
Oval
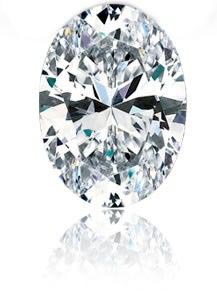
The oval shape is a classic, and is gaining popularity again (did it ever really go out of style though?). While some shapes like emerald and Asscher cut diamonds have little leeway for budging on the cut grade, the oval diamond is one you might be able to fudge a grade to save some money, but if that’s the case, you have to be wary of the bow-ties. This is something that a less than perfect cut grade will offer you. In an easy explantation, the bow-ties are caused by the facets in the middle of the diamond, not being the proper width, length and depth compared to the rest of the facets surrounding them.
On to the geometric proportions of this shape! Ovals will have our lucky number of 57 facets (58 if the point of the diamond is faceted to create a culet). You’ll find that the design and placement of facets is very similar to a round brilliant. On the crown of the oval, you’ll find bezel, star and upper half facets surrounding the table. Underneath on the pavilion, you’ll find pavilion main and lower half facets, and a culet if applicable.
The pattern in which the facets are placed, is very similar to the round brilliants however since the round is symmetrical all the way around, the difference here is that the oval is going to be slightly off from that. If you place the bezel facets at the same length and width as a RB, you’ll end up with a bow-tie. The more you know and understand these factors, the more keen your eye will be to pick out a winner amongst others that just don’t have the same kind of brilliance and sparkle the oval can offer.
Triangle
The fascinating shape of a trillion cut diamond is something many other diamond shape doesn’t offer. This intriguing diamond shape is stunning as a center stone on its own, but is often used as accents, on either side of a square, or rectangular shaped center stone.
The table on this shape will be slightly shaped like a shield, with crown facets in the shapes of wide diamonds, and scalene triangles (had to sneak another geometry term in there!). Under the girdle, the pavilion facets will consist of wider and narrow long triangles. There will either be 31 or 50 facets total, depending on the style of cut.
Square
Princess Cut
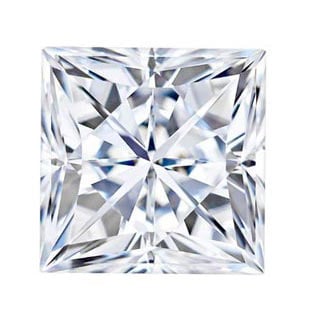
The princess cut diamond is second most popular diamond cut coming right behind the round brilliant. One of its most endearing qualities is the gorgeous chevron pattern the square cut offers. This is due to how the facets are placed on the diamond. There’s a total of 57 facets on this cut, on the crown there are 21, consisting of triangles, and rhombus shapes. Around the girdle is also faceted, creating nice, clean sharp edges. 33 facets will finish out the bottom side of the diamond, all in the shape of elongated triangles.
Cushion
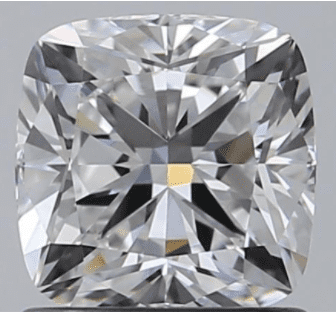
The cushion cut is a little on the outskirts of square, between that and circle, due to its softer, rounded corners and slightly beveled edges. While there are many stylized cuts of the cushion, the most common will include 58 facets on the crown and the pavilion. The shapes of the facets will depend on the style of cut- however the most common you’ll come across will be triangular, and diamond shapes. Most will have a common “star” pattern if viewing from underneath. This can range anywhere from 4-8 points to create the eye-catching design.
Since there are many shapes, sizes and directions of these facets, this creates an internal fire-storm of brilliance and scintillation (flashes of white light and colors). This can help to trick the eye into not noticing small inclusions internally.
Asscher
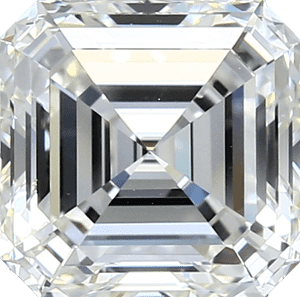
Another square (or technically octagonal, since the corners are cropped) shape is the Asscher cut that has a drastically different eye-catching visual. Instead of triangle facets creating a flashy, sparkling appearance, the facets are essentially rectangular, creating long, reflective facets that seem to be endless. This creates what’s called “the hall of mirrors” in the biz, and can be found in a few other cuts we’ll go over too.
The length, width and placement of the 58 facets in an Asscher cut diamond provide a truly breathtaking, lively design- and with just a few measurements off, the diamond would end up looking lifeless. Using our favorite field of mathematics, geometry is essential to this cut, with how the facets are arranged, otherwise it would just end of being a clear stone, with a few reflective surfaces under the girdle.
Above the girdle, there’s 4 rows of elongated, rectangular shaped facets, surrounding the table, with sets of faceted corners. On the bottom half of the diamond you’ll find 5 rows of the same shape facets, cascading down to the culet at a point. This creates the “hall of mirrors” effect we were talking about earlier. This illusion creates a look that is similar to that at a fun house- you know the ones that when you walk in the seem to go on and on forever, reflecting off each other? This allows you to see the light reflecting onto the facets, and then having that light bounce off again, seemingly endlessly.
Rectangle
Emerald

How does the old saying go? A rectangle is a square, but a square isn’t a rectangle? Something along those lines, but geometry class was a loooong time ago so we’ll just give the rectangular cut it’s own category until we figure that brain-teaser out!
The emerald cut diamond is the most popular rectangular diamond cut. Other more evenly-sided cuts like cushion and sometimes Asscher cuts can be elongated to fit the bill as rectangular, but their original shape would be more square. The emerald cuts are similar to Asscher shapes, in the fact that they also feature rows or tiers of facets. They have 57 facets, with 4 tiers of facets lining the crown, and corners, and 4 rows underneath called the pavilion tiers. While it may be surprising there are only 4 sets under the girdle, the refraction of light from the top of the diamond to the bottom make it seem like there are many more than that- hall of mirrors strikes again!
This is another shape that precise measurements, proportions and placement of facets is key- without that the diamond will look too clear, without the nice reflective chiseled edges of the aligning facets. This also makes it harder to find emerald cut diamonds that hide inclusions easily, while the shape is difficult too as it is, a poorly cut emerald will show anything and everything that’s inside that rock.
Radiant
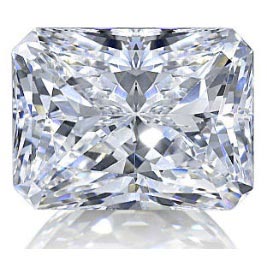
This diamond shape offers just what the name implies- radiance! This comes from extra facets (a total of 70!) placement, and precise measurement and symmetry. In a traditional radiant shape, there are elongated triangular facets lining the table, and then a singular row-edge of rectangular facets to the girdle. This helps to allow more light in at just the right degree, to help set off the sparkle and fire.
Underneath you’ll find the pavilion is lined with an eye-catching amount of triangular facets in many length and width variations. This creates a similar design to the cushion, to help create more reflective surfaces that can hide inclusions easier. Traditionally, there will be 4 elongated triangles, coming to a point at the edge of the diamond, and meeting at the base in the middle. This creates a gorgeous star pattern, that draws the eye when look from above, to the center of the table. The more elongated the diamond, the more drawn out and clear the facets become.

